Accessing Form Data from a Web Resource in Power Apps Model-Driven Forms

Accessing Form Data from a Web Resource in Power Apps Model-Driven Forms
Sometimes, you need to embed custom HTML components into model-driven forms to push beyond the out-of-the-box functionality. The Power Platform makes this relatively straightforward, with strong support for JavaScript (JS) and HTML web resources. However, getting those web resources to interact with form data isn’t always obvious. In this post, we’ll look at one way to solve that: passing the execution context to your HTML resource so it can access form data and behave more interactively.
Approach
To implement this solution, we’ll use two web resources:
- HTML file – Contains your custom UI and any JavaScript tied directly to the interactive elements of the HTML itself.
- JavaScript file – Hooked into the form’s On Load event. Its job is to wait for the HTML to finish loading, then pass the form’s execution context into it.
This approach keeps your code cleanly separated: the HTML handles display and interaction, while the JS file bridges the gap between the model-driven form and your custom content.
Example
Let’s imagine we have a Dataverse table called Notifications, where a new row is created automatically every time we send out an “Item Return Overdue” email from our IT Asset Management solution.
The table contains a field called Notification Content, which holds the raw HTML of the email, along with other metadata such as the recipient.
If we added the Notification Content field directly to the form, it would display as a plain string - including all the HTML tags. 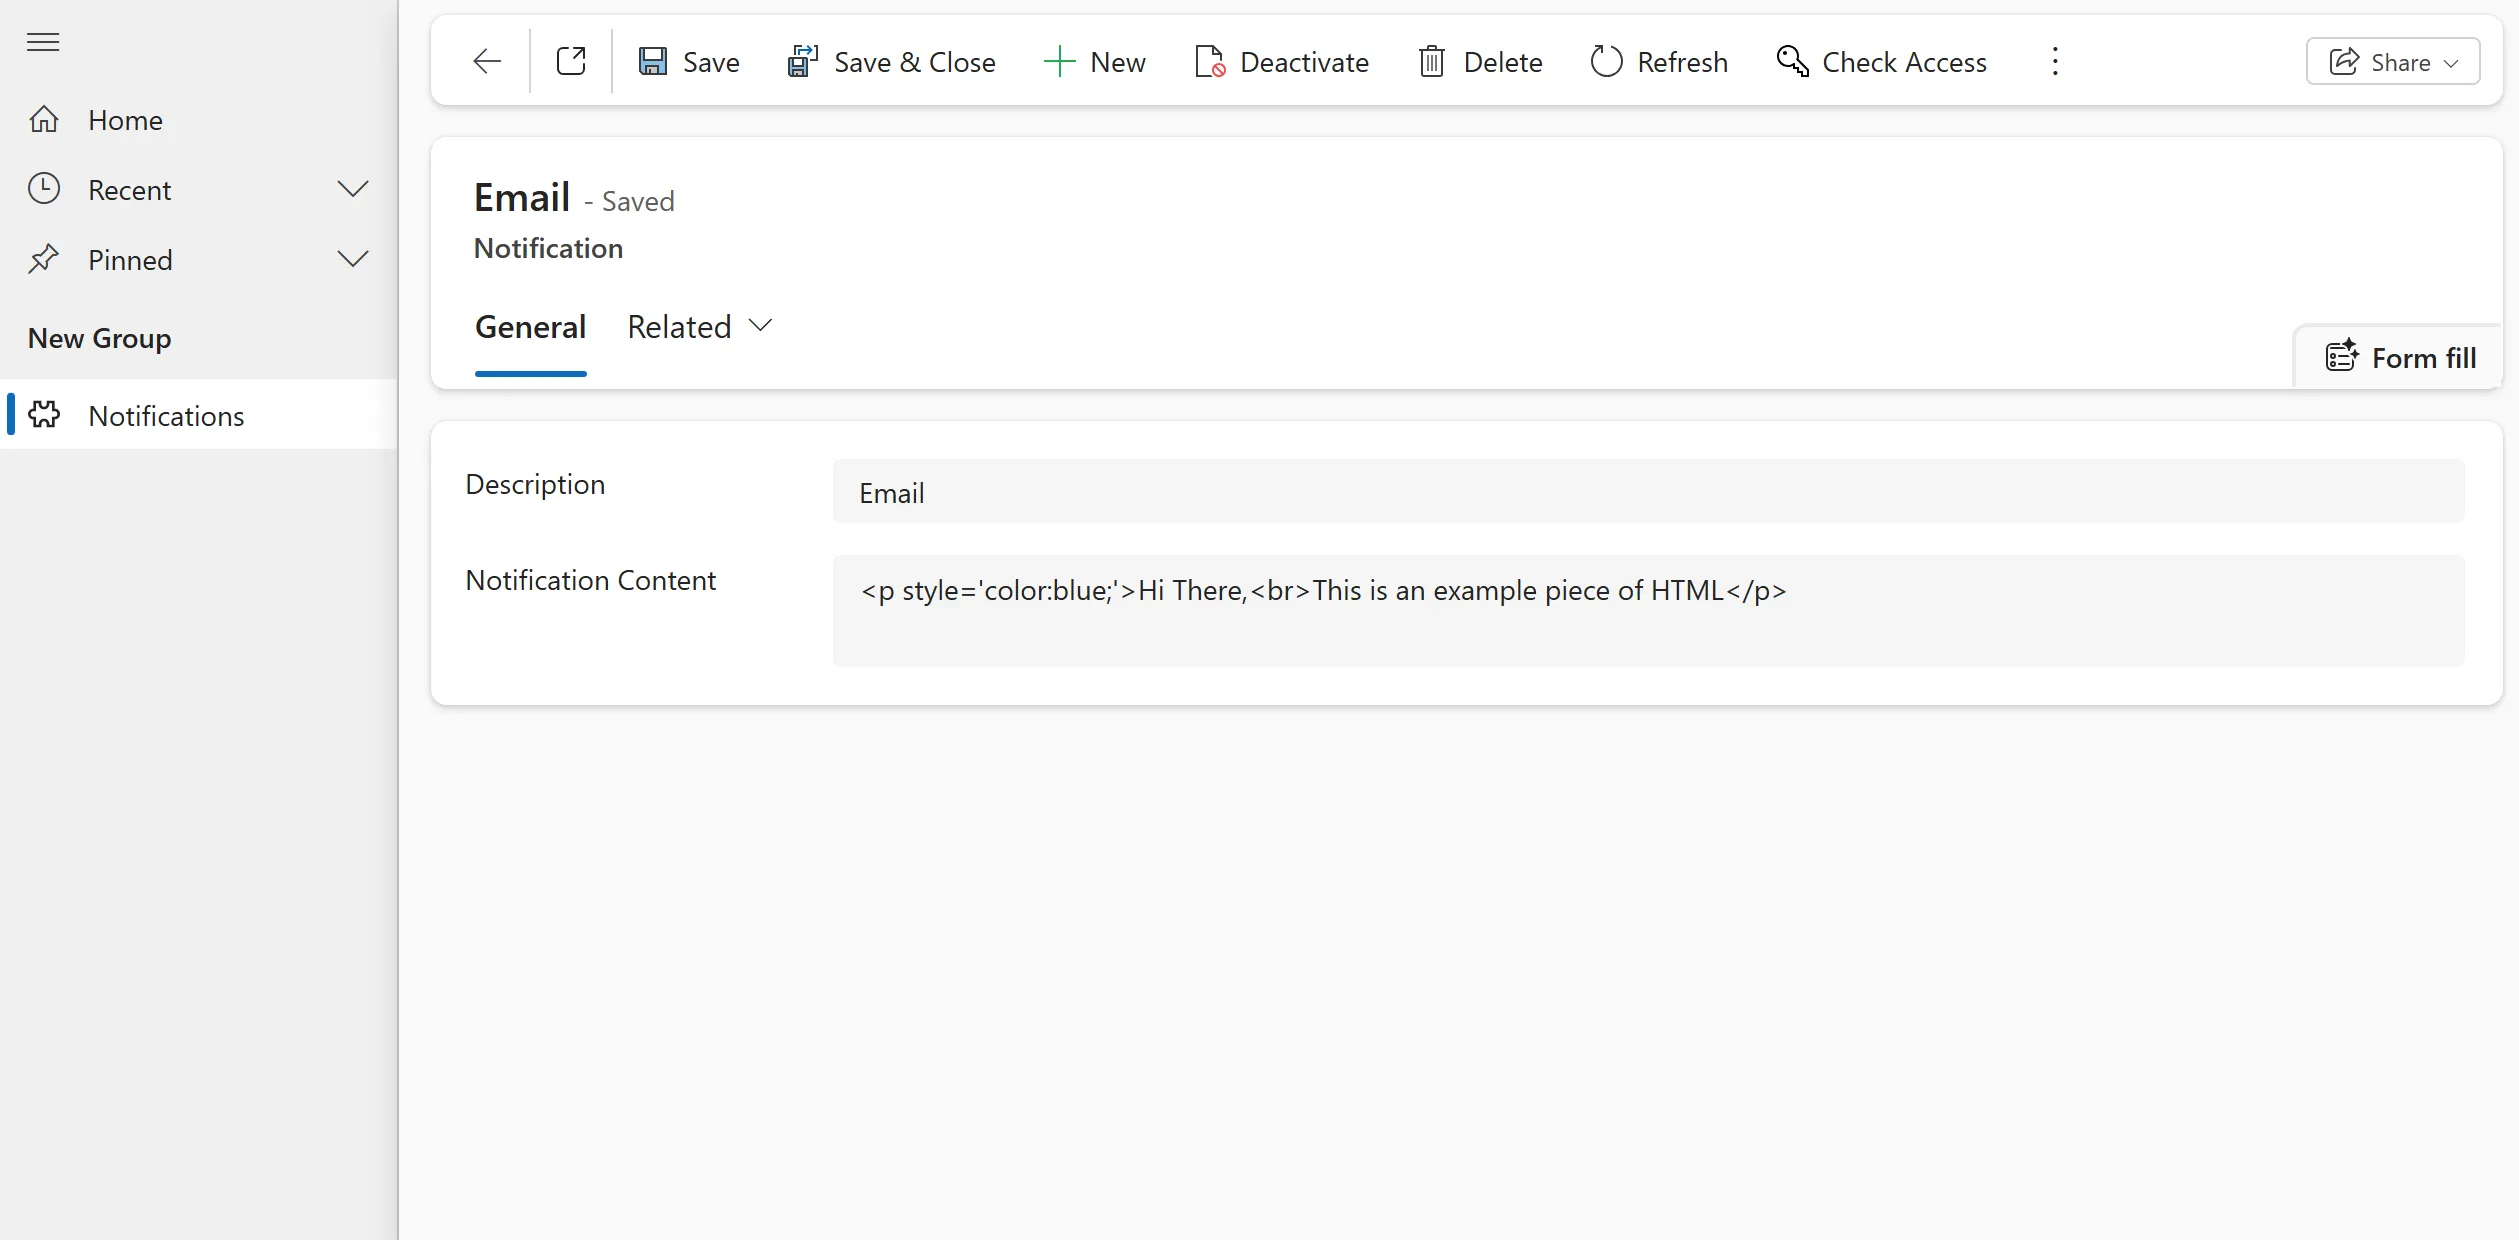
While that might be fine in some cases, we want to render the email properly, including styles and layout.
Create the Resources
Solution
Create a new Power Platform solution to house our web resources and Dataverse tables.
Data
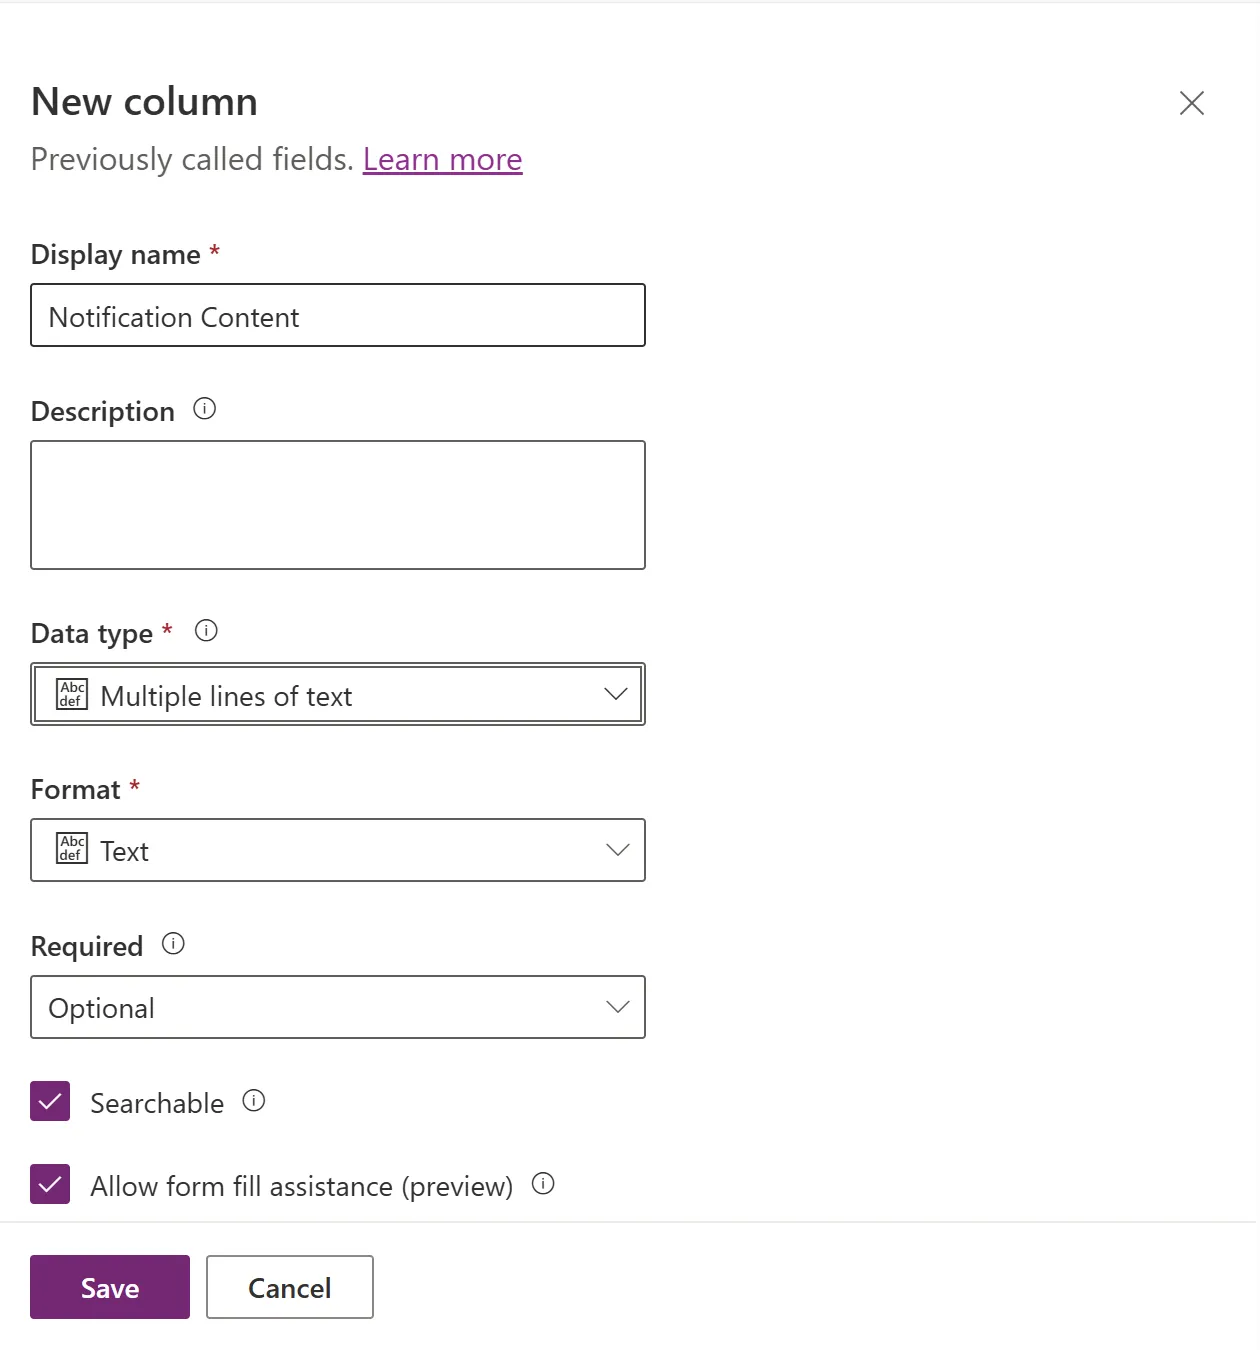
Create a new Dataverse table (with a name of your choice) and add a Multiline Text field (so we can store more characters) called Notification Content.
Take note of its logical name (including the prefix) - you’ll need it in the HTML.
HTML
This file contains the custom UI and the JS logic related to rendering the content. It defines a single function, which grabs the value of the Notification Content field and injects it into a predefined container in the HTML. There’s also some basic CSS for visual polish.
Upload the following HTML file as a web resource:
<!DOCTYPE html>
<html>
    <head>
      <meta charset="UTF-8">
      <title>Notification Content</title>
      <style>
        #notificationContainer {
          padding: 10px;
          border: 1px solid #ccc;
          border-radius: 6px;
          background-color: #f9f9f9;
        }
      </style>
    </head>
    <body>
      <div id="notificationContainer"></div>
    </body>
</html>

<script>
  function setNotificationContent(Xrm, formContext) {
    var notificationContent = formContext.getAttribute("prefix_notificationcontent").getValue();
    document.getElementById("notificationContainer").innerHTML = notificationContent;
  }
</script>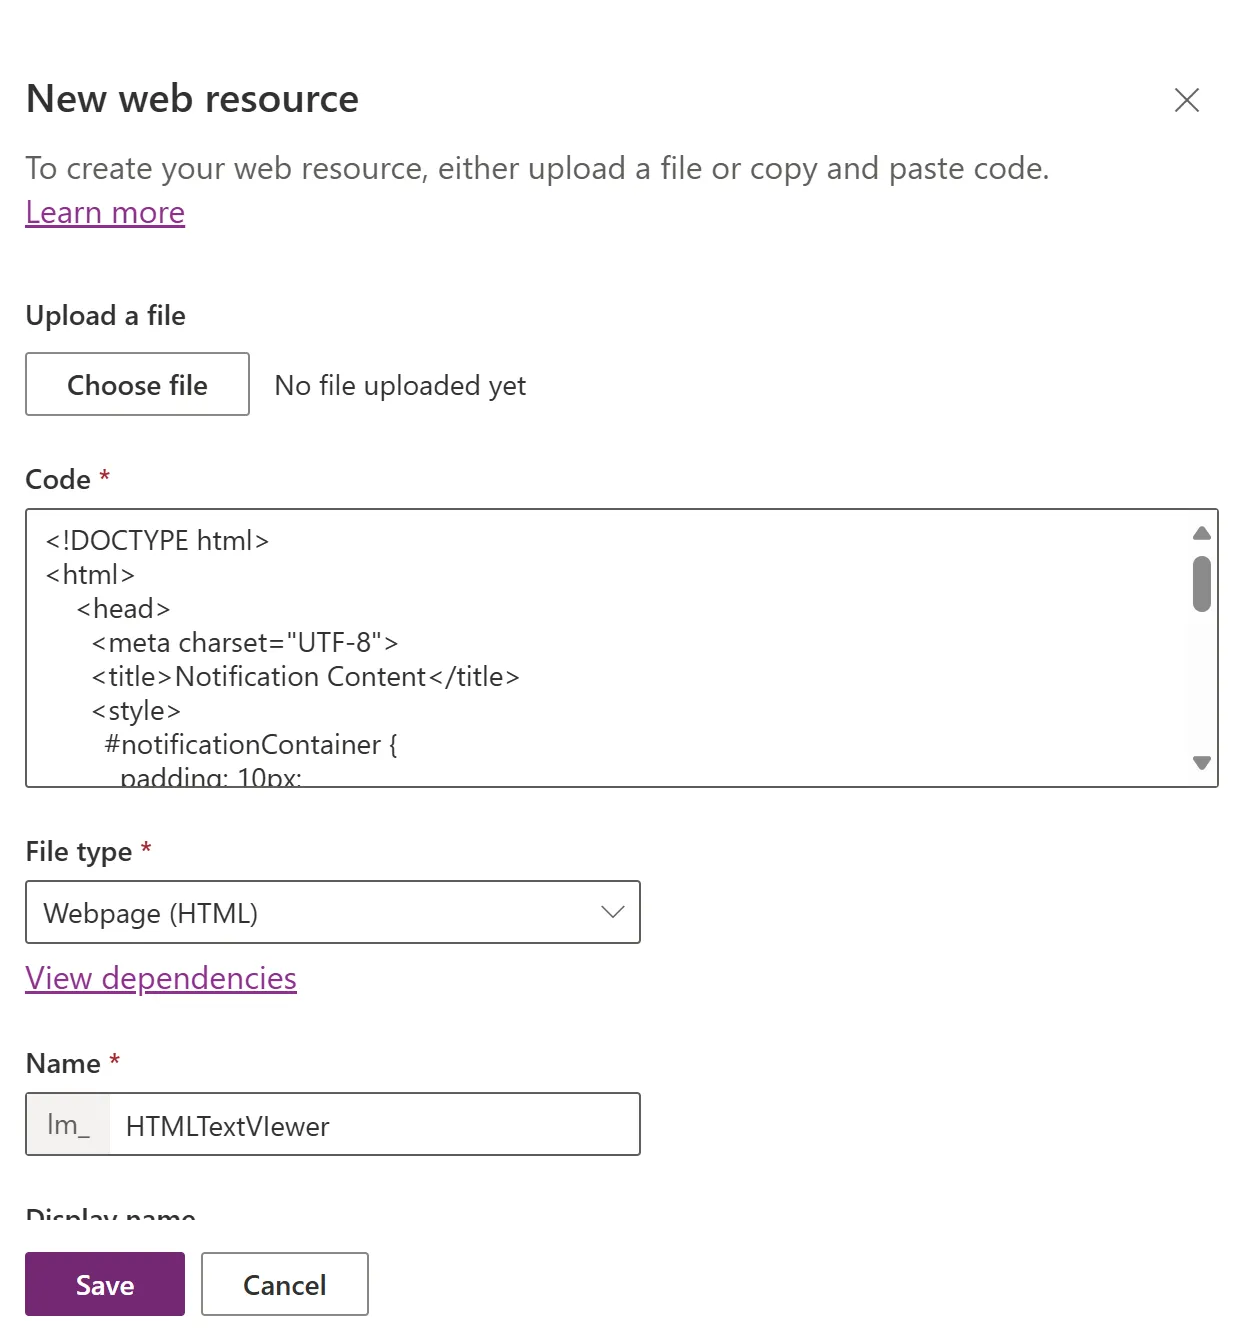
Note: Make sure to replace ‘prefix’ with your solutions prefix.
JS
This script bridges the form’s On Load event and the HTML web resource.
It uses a recursive function to wait for the HTML component to be fully loaded, then calls its setNotificationContent() function and passes in the execution context.
async function formOnLoad(executionContext) {
  const formContext = executionContext.getFormContext();
  const iframeControl = formContext.ui.controls.get("WebResource_notification_content");

  try {
    const contentWindow = await iframeControl.getContentWindow();

    function waitForNotificationLoad() {
      if (contentWindow && typeof contentWindow.setNotificationContent === "function") {
        contentWindow.setNotificationContent(Xrm, formContext);
      } else {
        setTimeout(waitForNotificationLoad, 100); // Retry after 100ms
      }
    }

    waitForNotificationLoad();
  } catch (error) {
    console.error("Error loading iframe contentWindow:", error);
  }
}
Upload the file as a webresource in the solution 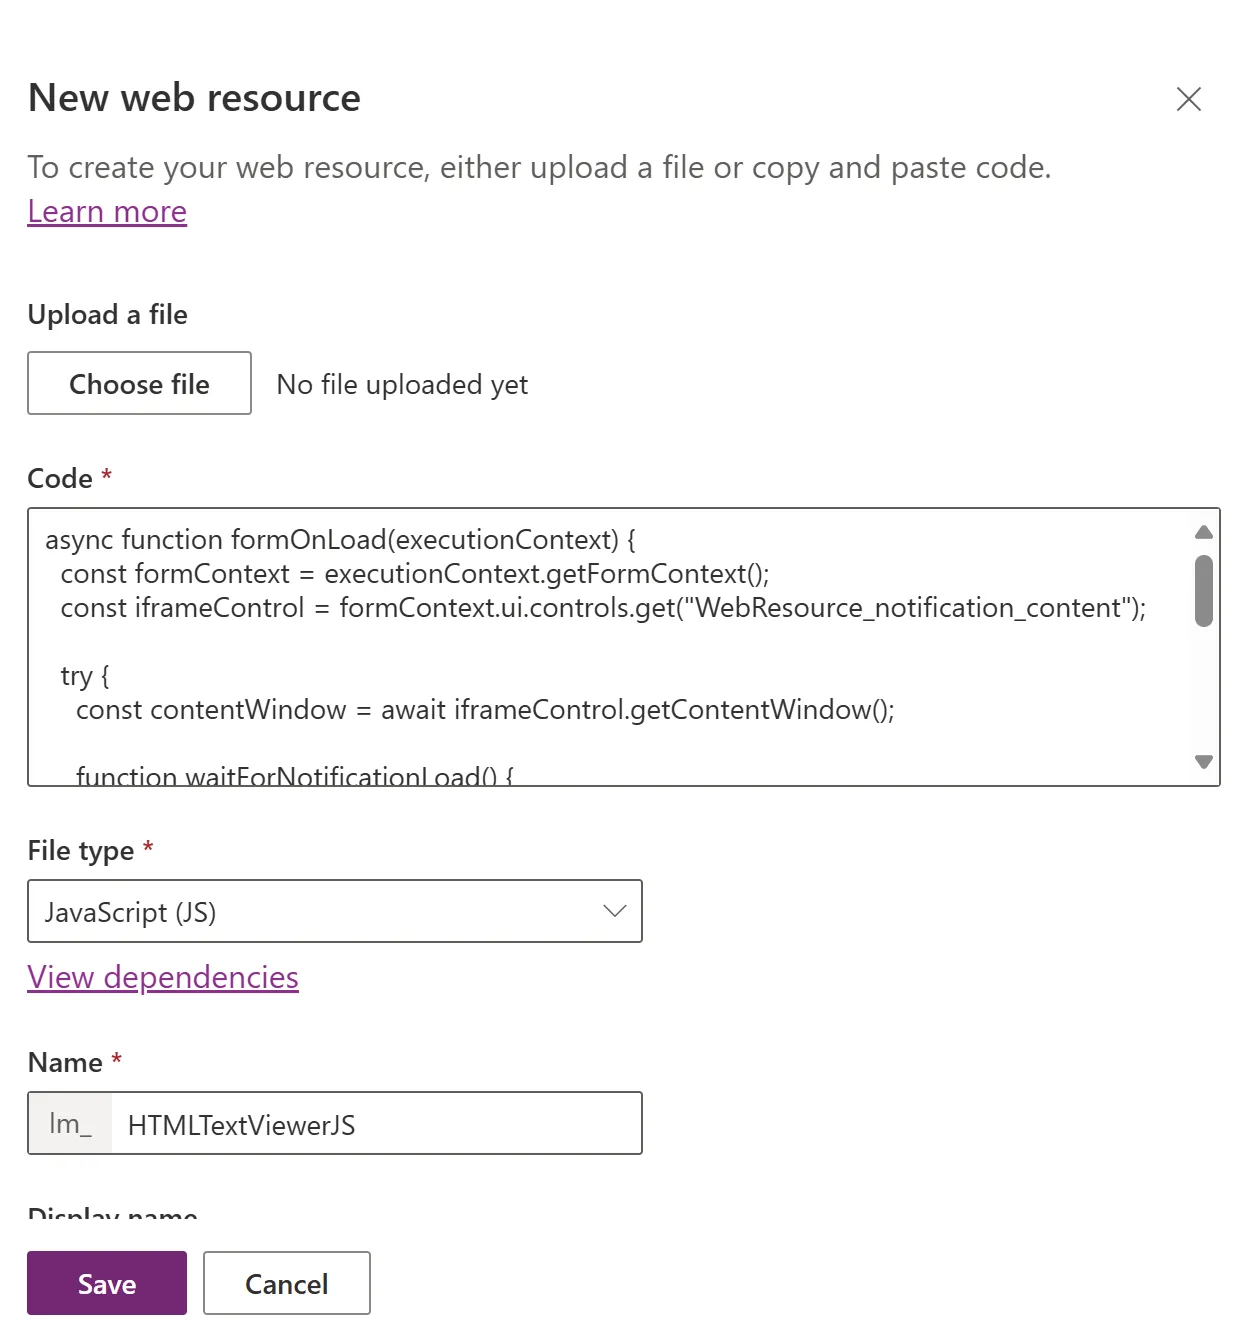
Note: Make sure to replace ‘WebResource_notification_content’ with the name of your HTML component.
Add Resources to the Form
- Edit the Main form for your new Notifications tab;e.
- Add the
prefix_notificationcontentfield to the form. - Add your HTML web resource to the form as a Web Resource control.
- Add the JavaScript web resource as a Form Library.
- Register a new On Load event handler for the form:
- Function name:
formOnLoad - Make sure “Pass execution context” is ticked.
- Function name:
- Save and publish your changes.
To test the setup, create a new notifications record in your app and include valid HTML in the Notification Content field.
When you reopen a record in the model-driven app (as its currently ran on load), you should see the rendered HTML in your embedded component.
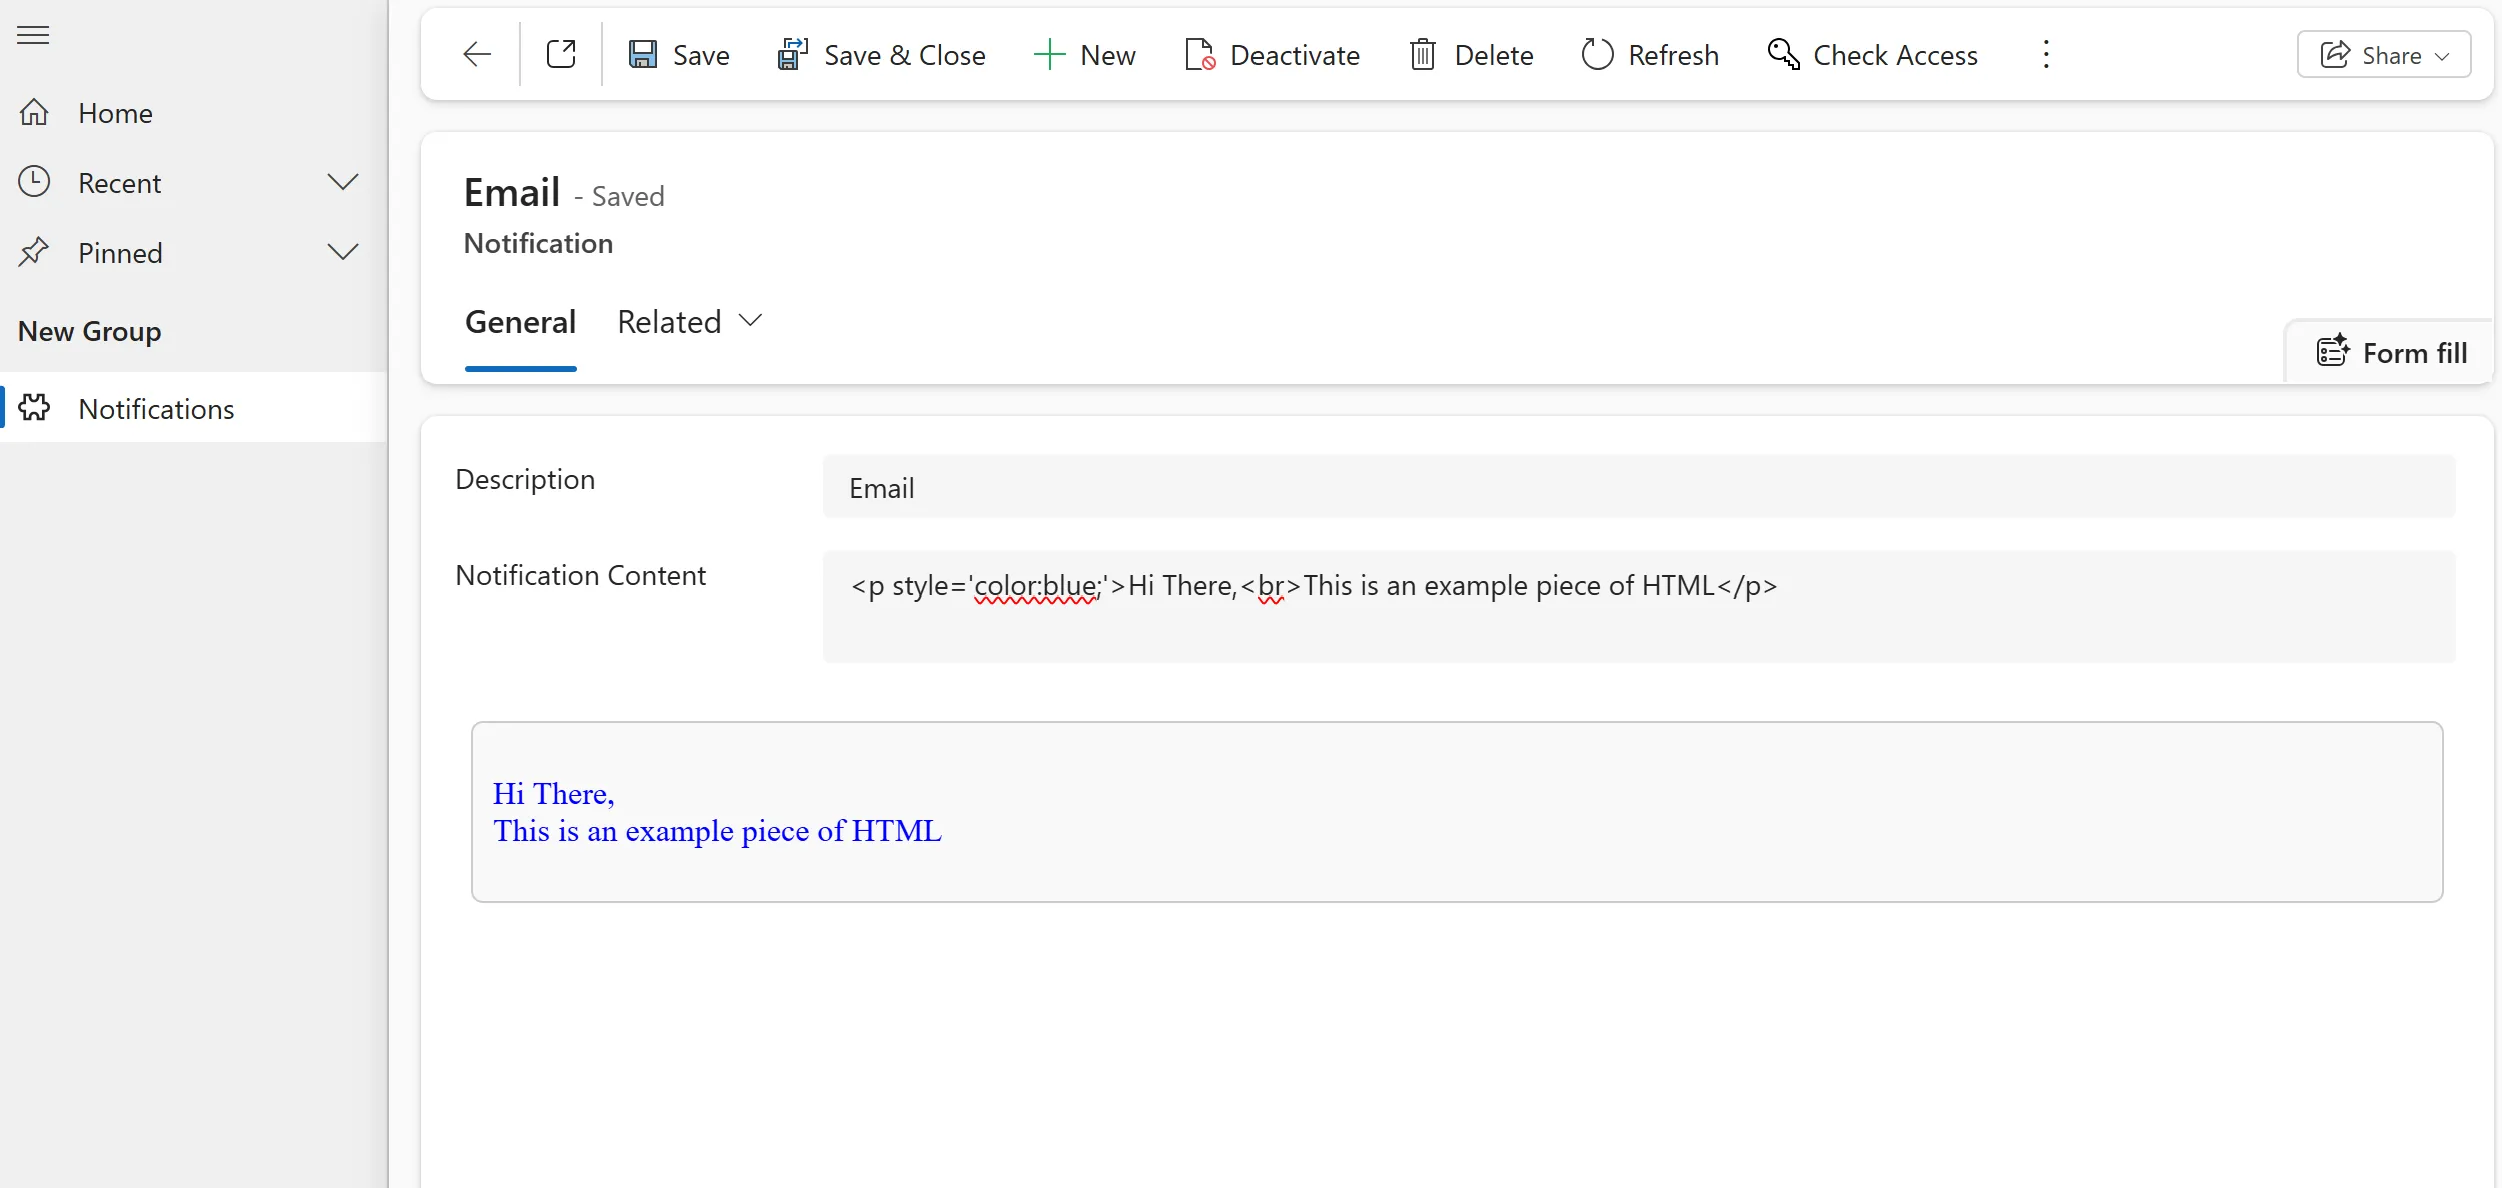
This could be extended to run on change of the Notification Content text area, or the field could be hidden completely if the records are generated automatically, through Power Automate.
Conclusion
It’s easy to embed custom UI components in model-driven forms, but connecting them to the underlying data can be tricky.
By following this approach - using a JS bridge to pass the execution context to an HTML component - you unlock far more flexibility in how data is displayed and interacted with inside the Power Platform.
What interactive elements will you be building next?
Why not let us know in the contact form.
Phone
+44 (0)1246 901755Related work and insights
 Insight
Microsoft platforms need more than break-fix support after go-live. Learn why Power Platform, Dynamics 365 and Microsoft 365 need managed services that protect both recovery and improvement.
 Work
WorkDiscover how a UK charity streamlined IT asset management with Microsoft Power Platform, Dataverse, and Intune integration.
 Insight
Learn how to create scalable, low-code business apps using Microsoft Power Platform and SharePoint Online. Compare approaches and explore real-world use cases.
 Work
WorkSee how a UK nursery group automated staff scheduling, attendance tracking, and payroll using PowerApps, SharePoint, and Microsoft Flow.